
Last Updated: October 26, 2026
Quick Summary
To fix a refrigerant leak, a technician must first confirm and locate the leak point, then replace the failed component, evacuate the system with a vacuum pump, and recharge to the under-hood specification. A recharge alone is not a repair, because the refrigerant that escaped will simply leak out again.
- A sealed A/C system holds its charge for years, so lost refrigerant escaped through a worn part.
- Intermittent cooling is the classic early clue of a small leak that holds pressure briefly.
- Dye and an electronic detector together catch the large majority of leaks.
- Federal rules require recovering remaining refrigerant rather than venting it to the atmosphere.
- A system that won’t hold vacuum after repair still has a leak.
Table of Contents
- Why a Refrigerant Recharge Won’t Fix a Leak
- Car A/C Refrigerant Leak Symptoms to Watch For
- Car A/C Leak Detection: How Mechanics Find the Source
- The Car A/C Leak Repair Process, Step by Step
- Leak Sealers and Temporary Fixes: What They Can and Can’t Do
- Car A/C Recharge After Leak Repair: Why the Details Matter
- Safe Refrigerant Handling and Where DIY Should Stop
- Schedule an A/C Leak Diagnosis at Our Parker Shop
- Frequently Asked Questions
Why a Refrigerant Recharge Won’t Fix a Leak
A refrigerant recharge is not a repair. It is a refill.
A sealed A/C system holds its charge for years.
According to the U.S. Environmental Protection Agency’s guidance on recharging vehicle air conditioners, federal rules do not require you to repair a leak before recharging, though some state or local rules may differ.
AutoZone’s own recharge guide is blunt: recharging will not fix a leak, and if the A/C stops blowing cold again, the system likely has one.
A refrigerant leak is a loss of the gas that carries heat out of your cabin.
Below, we walk through the symptoms, the detection process, and how a proper repair works.
Car A/C Refrigerant Leak Symptoms to Watch For
Catching a refrigerant leak early saves money. The signs show up in two places: what you feel in the cabin and what a technician sees under the hood.
Warning Signs You Can Notice from the Driver’s Seat
- Cold air that fades after a few minutes of driving
- A/C that works on some days and blows warm on others
- The system cools better at highway speed than in stop-and-go traffic
Intermittent cooling is the classic early clue. A small leak lets the system hold pressure for a while, then lose it.
What Technicians See Under the Hood
- Oil residue or grime collected around a fitting or hose
- A compressor that short-cycles or won’t engage
- Low system pressure on the gauge set
That oily dirt is a giveaway. Refrigerant carries lubricant with it, so a leak often leaves a damp, dirty stain at the failure point.
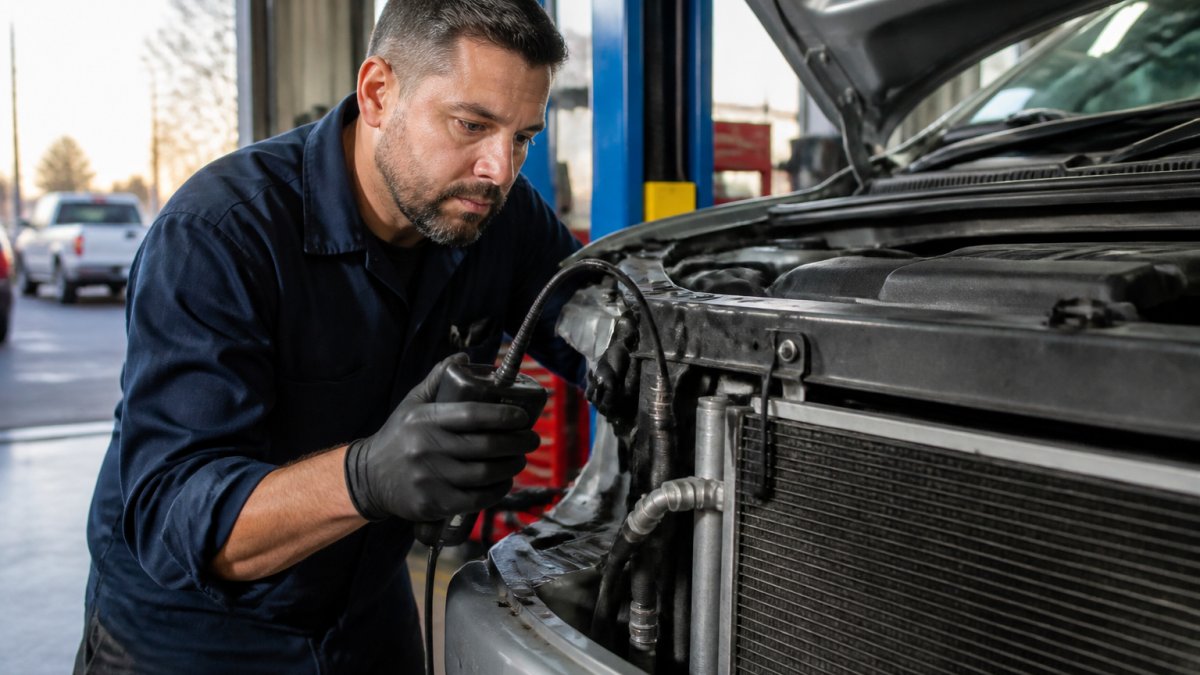
Car A/C Leak Detection: How Mechanics Find the Source
Finding the leak comes before fixing it. A technician confirms the system is low, then tracks down where it is escaping. Skipping this step is how drivers end up paying for the same recharge twice.
The Diagnostic Workflow, in Order
A good diagnosis follows a sequence. Guessing wastes time and parts.
- Confirm the complaint and check system pressures. A gauge set shows whether the low side and high side are both low, which points to a charge loss rather than a failed compressor clutch or a blend door problem.
- Inspect the easy, visible spots first. Service ports, hose fittings, and the condenser face get checked by eye for oily residue before any tool comes out.
- Add UV dye when the leak isn’t obvious. Dye circulates with the refrigerant and collects at the escape point. The technician runs the system, then scans with an ultraviolet light.
- Sniff the hard-to-see areas with an electronic detector. The detector picks up refrigerant at evaporator drains, compressor seals, and line joints that dye can’t easily reach.
- Pressure-test with nitrogen when dye and detector come up empty. The system is charged with dry nitrogen and watched for a pressure drop, which exposes slow leaks that only show up under load.
- Confirm the leak point before any part is ordered. A second look at the suspected fitting or component prevents replacing the wrong part.
Dye and an electronic detector together catch the large majority of leaks. The pressure test is the backstop for the stubborn ones.
Where Leaks Hide: Common Locations and Causes
Most leaks turn up in a handful of predictable spots. Each one points to a different repair, which is why location matters as much as detection.
- O-rings and seals dry out and crack with age and heat cycles. Repair: replace the seal, often a quick, low-cost job.
- Hoses develop cracks and pinholes from vibration and engine heat. Repair: replace the hose and its fittings.
- Condenser takes road debris and corrosion damage at the front of the car. Repair: replace the condenser, common after gravel strikes on mountain passes.
Matching the Finding to the Repair
Once the leak point is confirmed, the repair follows from it:
- Seal or O-ring leak: reseal or replace the seal. No major component swap needed.
- Hose leak: replace the hose and fittings, then evacuate and recharge.
- Condenser leak: replace the condenser. Road damage is the usual cause.
A common mistake is replacing the compressor when the real leak is a hose fitting. Proper detection prevents that.
Colorado makes some of this worse. Big temperature swings between summer heat and cold mountain nights work seals and hoses hard.
If you are weighing a repair quote, our guide to honest car repair quotes in Parker helps you read the estimate before you approve work.
The Car A/C Leak Repair Process, Step by Step
Once the leak is confirmed and located, the repair follows a set path. Here is how it works in our shop.
- Recover the remaining refrigerant. Federal rules require recovery rather than venting to the atmosphere (the EPA).
- Isolate and confirm the leak point. A second check makes sure you are fixing the right part.
- Replace the failed component. A hose, O-ring, condenser, or seal gets swapped for a new one.
- Flush or clean as needed. Contamination from a failed compressor has to be cleared.
- Evacuate the system with a vacuum pump. This pulls out air and moisture.
- Hold vacuum to confirm a seal. A system that won’t hold vacuum still has a leak.
- Recharge to the specified charge amount. Too much or too little hurts cooling.
- Test cooling performance. The technician verifies vent temperature and system pressure.
Matching the Repair to the Failed Component
The right fix depends on what failed:
- O-ring or seal: replace the seal, often a low-cost, quick job
- Hose: replace the hose and its fittings
- Condenser: replace the condenser, common after road damage
A common mistake is replacing the compressor when the real leak is a hose fitting. Proper detection prevents that.
If you are weighing a repair quote, our guide to honest car repair quotes in Parker helps you read the estimate before you approve work.
Here is the order a proper leak repair follows in our shop.
| Step | What to do |
|---|---|
| 1 | Recover the remaining refrigerant |
| 2 | Isolate and confirm the leak point |
| 3 | Replace the failed component |
| 4 | Flush or clean as needed |
| 5 | Evacuate the system with a vacuum pump |
| 6 | Hold vacuum to confirm a seal |
| 7 | Recharge to the specified charge amount |
| 8 | Test cooling performance |
Leak Sealers and Temporary Fixes: What They Can and Can’t Do
Leak sealers are a stopgap, not a cure. They can slow a small leak for a while, but they do not restore a failed part, and they can cause problems of their own.
Here is the honest trade-off:
- What they can do: slow a minor seep long enough to get you through a stretch of hot weather
- What they can’t do: fix a cracked hose, a bad condenser, or a worn compressor seal
- The risk: sealer can clog expansion valves, coat sensors, and contaminate the system
A temporary top-up or sealer might buy time, but it won’t fix the leak and can make the eventual repair harder. Cleaning sealer out of a system adds labor.
Our take: use a sealer only as a short bridge, and tell your technician it is in the system.
Car A/C Recharge After Leak Repair: Why the Details Matter
A car A/C recharge after leak repair is not just “fill it up.” The details decide whether the fix lasts, and this is where a repair either holds or comes back.
Evacuation Comes First, and It Isn’t Optional
Before any refrigerant goes back in, the system is pulled down with a vacuum pump. This does two jobs:
- Removes air. Air in the system raises pressures and cuts cooling performance.
- Boils off moisture. Moisture left behind combines with refrigerant to form acids that attack metal and seals from the inside.
The technician then holds the vacuum and watches the gauge. A system that won’t hold vacuum still has a leak, even after the visible part was replaced. Skipping the hold test is guessing.
Oil: The Part Drivers Forget
Refrigerant carries compressor oil with it, so a major leak can leave the system low on oil even after the leak is fixed. If the compressor was replaced or a large leak drained the system, the oil charge is restored to the vehicle specification. Too little oil wears the compressor; too much coats the evaporator and cuts cooling.
Charge to the Vehicle Specification, Not by Feel
The correct charge amount is printed on the under-hood refrigerant label. That label also tells you which refrigerant the system takes. Two things go wrong when this is ignored:
- Overcharging raises head pressure and stresses the compressor.
- Undercharging leaves the system short on cooling and can let the compressor short-cycle.
- Mixing refrigerant types can damage the system and contaminate recovery equipment.
A shop that charges to the label and verifies vent temperature afterward is doing it right. A shop that fills until it “feels cold” is guessing.
Why This Matters in Colorado
A system correctly evacuated and charged to spec handles the temperature swings between a hot Front Range afternoon and a cold mountain night far better than one that was topped off. Moisture left in the system is the usual culprit behind a repair that fails the next season.
A lasting A/C repair is three steps, not one: fix the leak, evacuate and hold vacuum, then charge to the under-hood spec with the right oil. Skip any of them and the repair is temporary.
If you want the full diagnostic-and-repair walkthrough for warm air, see our article on vehicle A/C repair.
Safe Refrigerant Handling and Where DIY Should Stop
Refrigerant handling is regulated, and for good reason. Venting refrigerant to the atmosphere is illegal under federal rules (the EPA).
Where DIY should stop:
- Once you confirm the system is low and the leak is real
- When the leak is at the condenser, evaporator, or compressor
- When you don’t have a vacuum pump and a gauge set
You can check pressures and look for oily residue yourself. The repair and recharge belong to a shop with the right tools.
Choosing that shop matters. Our guide on how to choose a local mechanic in Parker covers the questions to ask before you hand over the keys.
Schedule an A/C Leak Diagnosis at Our Parker Shop
A warm A/C in a Colorado summer gets worse with delay.
At Eagle Transmission & Auto Repair, we have served drivers in Parker and the surrounding communities for over 40 years.
We won’t promise a fix before we diagnose it.
If you want the full diagnostic-and-repair walkthrough for warm air, see our article on vehicle A/C repair. When you’re ready to book, visit our diagnosis and repair page for Parker to get started.
Get a quote from Eagle Transmission & Auto Repair and get your A/C blowing cold before the next heat wave.
Frequently Asked Questions
What are the most common signs of a refrigerant leak in a car A/C system?
The clearest sign is A/C that blows cold at first and then turns warm, or cooling that comes and goes. You may also notice a musty or sweet smell, oily residue around A/C lines and fittings, or the compressor cycling on and off quickly. Because refrigerant carries lubricating oil, a leak often leaves a visible oily trace. If cooling fades within days or weeks of a recharge, a refrigerant leak is the likely cause and should be confirmed with proper leak detection rather than another top-up.
Can I just recharge my car A/C without fixing the leak?
A recharge adds refrigerant but does not repair the leak, so cooling will fade again once the new charge escapes. The EPA notes that federal rules do not require leak repair before recharging a vehicle’s A/C, though some state or local rules may differ. Even so, repeated top-ups waste money and let the system run low on oil, which can damage the compressor. Confirming and repairing the leak is the lasting fix; a recharge should follow the repair, not replace it.
How do mechanics find a refrigerant leak in a car?
Mechanics use a combination of methods: electronic leak detectors that sense refrigerant in the air, UV dye added to the system and checked with an ultraviolet light, soap solution on fittings and lines, and pressure tests to see if the system holds. A complete diagnostic workflow starts with confirming the complaint, checking system pressures, then pinpointing the leak location before recommending a repair. This approach avoids replacing parts that are not the source of the loss.
Is it safe to drive with a car A/C refrigerant leak?
Driving with a refrigerant leak is generally not an immediate safety hazard, but it is not something to ignore. A system low on refrigerant also runs low on lubricating oil, and the compressor can wear out or seize, turning a smaller repair into a larger one. Refrigerant should be handled by trained technicians using recovery equipment. If cooling has dropped or you smell something unusual, have the system checked at a shop serving Parker and nearby communities.